

A dummy board can make a hive easier to manage, but it isn’t a substitute for sound hive management. If you’re unsure where it belongs, whether it could restrict the colony or encourage unwanted comb, that hesitation is sensible. Effective dummy board beehive use means treating it as a space-management tool, not simply another frame.
This guide explains what a dummy board does, what it can’t do and how to position it beside the frames as a colony grows. You’ll also learn how it can create working space for inspections and how dummy boards differ from follower boards and wider “fat dummies”. The right type and dimensions depend on your hive format. British National hives provide a familiar example, but the board must fit the hive you’re using. With the basics clear, you can adjust the occupied space while keeping the colony’s needs at the centre.
Key Takeaways
- Use a dummy board to organise unused hive space, not as a replacement for frames or sound colony management.
- Match the board to the correct hive box and position it beside the outermost frame without forcing a tight fit.
- Dummy boards, follower boards and fat dummies can differ in fit and purpose, and beekeepers may use the terms differently.
- Review the board during inspections and adjust it as the colony develops, checking for damage and unwanted comb.
- Choose a design and material suited to your hive format, considering fit, cleanability, durability and ease of handling.
What is a dummy board and how is it used in a beehive?
A dummy board occupies unused space inside a hive. It sits alongside the frames to mark the edge of the area the colony is using, keeping the frame arrangement orderly when a box isn’t full. It doesn’t replace a frame: frames support comb, brood and stores, while the board helps manage the space around them.
In an under-filled box, a dummy board can make the occupied area easier to handle and inspect. Depending on the board’s fit and the hive conditions, reducing open space may help the colony manage its surroundings and may limit opportunities for brace comb in gaps. These are possible benefits, not guarantees. A board won’t maintain a particular temperature, prevent all unwanted comb or tell you whether the colony is healthy. Regular inspections and appropriate colony management still matter.
Where does a dummy board sit in the hive?
Place it beside the outermost frame in the occupied frame block, following the arrangement suited to your hive design. The board creates a defined boundary between the frames and unused space in a partly filled box. Keep the colony’s frames together rather than spreading them across the box to fill gaps. A coherent block is easier to manage. The National beehive is one familiar example where beekeepers may use a dummy board when running fewer than the full complement of frames.
What can a dummy board help a beekeeper manage?
Think of it as a practical aid for managing space and handling frames. It can give the occupied frames a clear boundary rather than leaving a large unoccupied area beyond the last frame. During an inspection, moving the board first can also create working room at the edge of the frames, making it easier to lift the outer frame without disturbing the whole block.
- Frame organisation: The board marks the edge of the occupied frames in an under-filled box.
- Inspection access: Removing or shifting it can create space to handle frames more carefully.
- Unused space: It occupies part of the box that would otherwise remain open, although the result depends on the hive and board.
Keep its purpose in perspective. A dummy board doesn’t regulate colony health, compensate for poor frame placement or remove the need to check for brood, stores, damage and signs of unwanted comb. Its role is to organise the space around the frames. Fit it as part of a considered frame arrangement, then assess how it’s working during routine inspections.
How to position a dummy board in a beehive
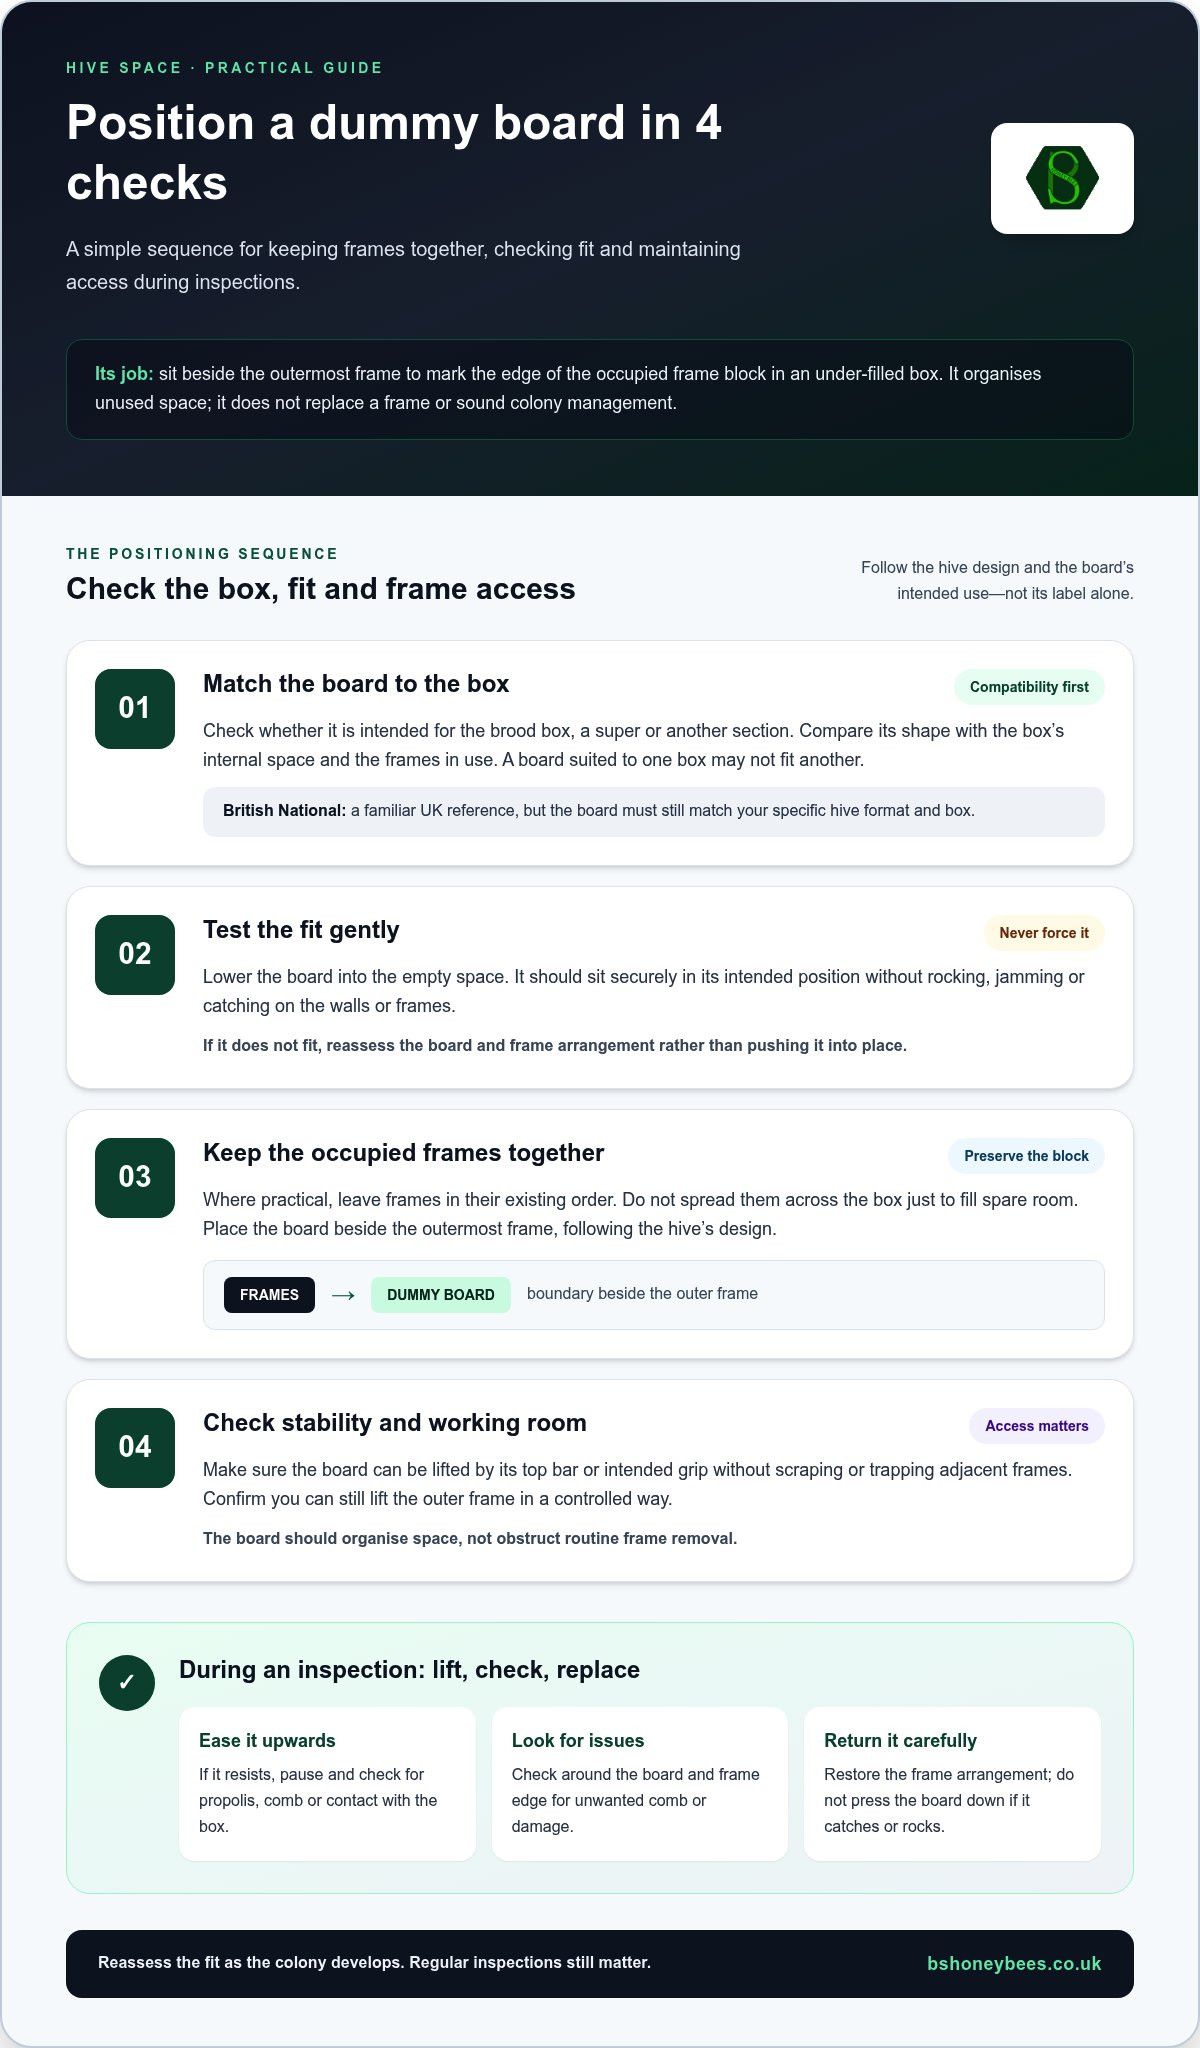
A good fit starts with the right board for the right part of the hive. Don’t assume a board that suits one box will fit another, even if both are part of the same hive. Use this sequence to check the board and frame arrangement, then reassess the fit during inspections.
- Identify the hive box and board. Check whether the board is intended for the brood box, a super or another section, and whether its design suits that box. Compare its shape with the internal space and the frames in use. British National hives and frames offer a familiar UK reference, but dimensions must still match the specific hive format and box. Apply the same compatibility check to the British National hives and frames in your set-up.
- Check the fit before placing it. Lower the board gently into the empty space. Don’t force it against the box or frames. It should sit securely in the intended position, without rocking, jamming or catching on the walls. If it doesn’t, reassess the board and frame arrangement rather than pushing it into place.
- Keep the frames together. Where practical, leave frames in their existing order and keep the occupied block together. Don’t spread frames across the box just to use up spare room. Move the board alongside the outermost frame, following the hive’s design, so it marks the edge of the frame area.
- Test access and stability. Check that the board sits securely and can be lifted by its top bar or intended grip without scraping or trapping adjacent frames. Make sure you can still lift the outer frame in a controlled way. The board should organise the space, not obstruct routine frame removal.
Removing and replacing the board during an inspection
At inspection, ease the board upwards rather than wrenching it free. If it resists, pause and check for propolis, comb or contact with the box before applying more movement. Set it somewhere stable and clear of the working area, and note its orientation so you can return it to the same position without disturbing the frame order.
When replacing it, lower it carefully beside the outer frame and check that it sits as before. Don’t press it down if it catches or rocks. Look along the frame edge and around the board for comb or damage that could affect handling. If the frames have shifted during the inspection, restore the intended arrangement before placing the board.
Before closing the hive, check that the board is secure, the frames remain accessible and nothing has been forced into a tight fit. These checks help keep inspections controlled. Fit and handling vary with hive design, so use the box and frame arrangement as your guide rather than relying on the board’s label alone.
Dummy board, follower board or fat dummy: what is the difference?
These names describe related ways of managing space inside a hive, but beekeepers don’t always use them consistently. A board’s shape, fit and intended job are more useful guides than its label. Broadly, a standard dummy board sits beside the frames to occupy unused space, a follower board acts more like a movable partition, and a fat dummy is wider than a standard frame-sized board.
| Board type | Typical form | Purpose and context |
|---|---|---|
| Dummy board | Usually similar in outline to a frame, with bee space around its perimeter in some designs. | Organises the edge of a partly filled frame area. Its role depends on the hive design and how the board fits. |
| Follower board | A movable board designed to sit more snugly across the hive’s internal space, with little clearance at the edges. | Can partition the box and create a more defined boundary for the occupied area. |
| Fat dummy | A deliberately wider board that occupies more room than a standard dummy board. | May be used to reduce the available space further or as part of a specific management method. |
How is a follower board different from a dummy board?
The distinction isn’t universal. Some beekeepers use “follower” and “dummy board” interchangeably, while others distinguish a follower by its closer fit and partitioning function. A follower is generally a movable false wall within the hive, whereas a dummy board is often used alongside the frame block. Before using either, consider whether its design suits the box and provides the intended clearance. Prioritise fit and purpose over terminology.
What makes a fat dummy different?
A fat dummy is broader than a standard board and can take up space that would otherwise accommodate more than one frame. Its width and use can vary. Some are used in specialised manipulations, including particular queen-rearing methods, rather than routine frame-space management. Don’t assume a fat dummy can be swapped directly for a standard board: its size changes the layout and may affect how the hive is managed.
Insulation is a separate design feature, not a reliable definition of any one board type. Some boards may be insulated, but a thicker or insulated board isn’t automatically a follower or a fat dummy. Check what the board is designed to do and whether it fits the specific hive format before placing it.
For everyday dummy board beehive use, focus on three questions: how much space the board occupies, how closely it fits the box, and whether it allows the frames to be handled as intended. If you’re considering a fat dummy for a queen-rearing method, follow guidance for that method rather than treating it as a general-purpose alternative.
When to adjust or remove a dummy board during hive management
Adjust the board in response to the colony and the space available, not simply because a particular date has arrived. As a colony develops, the frame arrangement that suited a smaller occupied area may no longer be appropriate. Consider the box in use, the frames it contains and the colony’s current requirements before moving the board.
There’s no single seasonal timetable that suits every hive. Conditions and colony development vary, so use inspections to assess whether the board remains secure, undamaged and sensibly positioned. Change the arrangement when there’s a clear management reason, and avoid extra disturbance that doesn’t help you complete the inspection.
What should you check during an inspection?
Check the board and the space around it as part of your normal inspection. Look for damaged edges, loose fittings or signs that it rocks or no longer sits securely in the box. Check for brace comb around the board and whether the current layout still allows you to reach and remove frames in an orderly way.
- Condition: Look for splits, warping or other damage that could affect safe handling.
- Position: Check that the board is stable and hasn’t shifted against the frames or box.
- Comb: Note brace comb around the board and whether it interferes with frame access.
- Frame access: Make sure the arrangement still allows you to inspect frames without unnecessary disturbance.
If you spot a change, record it alongside your other inspection notes. A brief note can help you track changes in the colony’s occupied space over successive inspections. Avoid moving the board just to make the hive look neater. Keep changes purposeful and proportionate to the task.
When should the board be moved or taken out?
Consider moving it when colony development changes the amount of frame space needed or when you’re carrying out a planned rearrangement. If the board obstructs safe access during an inspection, remove it carefully, set it somewhere stable and replace it when you’ve finished the relevant work. Check its condition and position again before closing the hive.
Don’t remove a board solely because of a calendar date or a generalised seasonal rule. Base the decision on the colony, available space and hive format. If the arrangement still serves its purpose and allows orderly access, there may be no reason to change it. If the box or frame layout has changed, reassess the board’s fit rather than assuming it remains suitable.
Make board checks a considered part of hive management, not a set-and-forget task. If you’re reviewing your hive format as part of a layout change, explore British National hives and frames as one familiar UK option.
Choose a dummy board that matches your hive and use it safely
A dummy board only works as intended if it suits the box it sits in. Hive formats and box depths differ, so don’t choose by the general label alone. A board marked for a National hive, for example, still needs to match the particular section and frame arrangement you’re using. Poor fit can make the board unstable, obstruct frame handling or leave gaps that undermine its purpose.
Use these checks before putting a board into service:
- Hive type: Match the board to the precise hive format, not just a similar-looking box.
- Box depth: Check whether it’s intended for the brood box, a super or another section.
- Overall dimensions: Compare the board’s height and width with the box interior and frame arrangement.
- Profile and fit: Make sure its top bar and sides sit as intended alongside the frames, without rocking, jamming or creating an unexpected gap.
- Handling: Check that you can lift and replace it safely without catching on frames or the hive walls.
Which dimensions and design details matter?
Measure the box and consider how the board sits next to the outer frame. Catalogue labels can help identify a likely match, but they don’t replace checking the hive itself. This is especially important if components have been mixed, adapted or replaced over time. A board that’s too tall may not sit correctly; one with an unsuitable width or profile can make the frame block awkward to handle. Don’t force a mismatch into place.
How to maintain the board and build a suitable hive setup
Material affects how a board feels in use and how it should be cared for. Wood and plastic, for example, can differ in weight, durability, surface finish and ease of cleaning. Neither material is automatically best for every beekeeper or hive. Consider whether the board is comfortable to handle, can be cleaned appropriately and remains sound through repeated use. Follow suitable apiary hygiene practices and care for the material as intended.
Check the board during inspections. If it’s cracked, warped, loose or difficult to lift safely, repair it if that restores a secure fit, or replace it. Don’t keep using a damaged board that catches on frames or shifts unexpectedly. Good fit and condition support a predictable layout, but they don’t remove the need to inspect the colony and the space around the board.
For British National hive-format context, the British National beehive guide can help you understand the hive components and how the format is organised. BS Honey Bees Ltd supplies British National hives and frames to help you build a consistent equipment set-up. Match the board to the box, assess how it handles, and make its use part of a considered hive arrangement.
Make your next hive adjustment with confidence
Let the colony’s needs guide your next step. As your set-up changes, check that each component still works with the box and frame arrangement you’re using. A deliberate approach to dummy board beehive use helps you manage space without treating the board as a fix for every hive challenge.
When you’re planning a consistent equipment set-up, BS Honey Bees Ltd supplies British National hives and frames, alongside beekeeping equipment for beekeepers across the UK. Choose equipment that suits your hive format and supports the way you manage your colony.
Explore British National hives and beekeeping equipment, then put your knowledge into practice at your next inspection. Check the fit and make adjustments with the colony’s needs in mind.
Frequently Asked Questions
Can you use a dummy board in any beehive?
No. A dummy board must suit the hive type and the particular box where it will be used. Hive formats differ, so a board that fits one brood box may not suit another hive or a super. Compare the board with the box’s internal dimensions and frame arrangement before placing it. A British National board, for example, shouldn’t be assumed to fit a different format.
Does a dummy board replace a frame in a beehive?
No, it doesn’t provide the comb-bearing function of a frame. Frames hold comb, brood and stores, so keep them in place as the colony’s needs require. A dummy board is an additional hive component used alongside the frame arrangement. If you’re deciding whether the box needs another frame or a board, base that decision on the colony’s development and available space, not on treating the two components as equivalents.
Can a dummy board help prevent brace comb?
It may help limit opportunities for brace comb by occupying some unused space, but it can’t guarantee that bees won’t build comb in unwanted places. The result depends on the board’s fit and the hive arrangement. During inspections, look for comb attached to the board or nearby parts of the box. Manage unwanted comb appropriately, and reassess the layout if the same area repeatedly causes handling difficulties.
Should you leave a dummy board in the hive during winter?
It depends on the colony, the hive arrangement and local conditions, so there’s no universal winter rule. Some beekeepers use boards to define a smaller area around a small colony; others may arrange boards differently. Don’t add or remove one purely because winter has arrived. Consider whether the board is secure and whether the colony has the space it needs, then follow your normal inspection and seasonal management approach.
How do you clean a dummy board?
Clean it according to its material and condition, using sound apiary hygiene practices. First remove loose wax or propolis carefully, taking care not to damage the board. Avoid methods or cleaning products that could leave residues or harm the material. If the board has been exposed to a known disease concern, follow current authoritative disease-control guidance rather than relying on routine cleaning alone. Let it dry fully before storing or reusing it.
Can you make a dummy board yourself?
Yes, beekeepers sometimes make boards from materials such as plywood offcuts, but accurate fitting and safe handling matter more than saving material. Measure the intended box and check the board’s profile against the frames before use. Keep edges smooth, avoid loose fittings and don’t use a board that rocks, jams or leaves an unintended gap. Inspect a homemade board regularly, as wear or warping can affect its fit.