

A beehive stand can look sturdy but still wobble once the ground softens or the hive is in place. If you’re working out how to build a beehive stand, plan for more than the timber: the hive’s footprint, your inspection height and the surface beneath it all affect how well the stand works. Measure and assess the site before cutting to avoid an uneven or awkward support.
This guide covers the process from choosing materials and tools to measuring, assembling and levelling the finished stand. You’ll learn how to match it to your hive, allow room to work and build a stable base for your apiary. Check your hive format before setting dimensions. If you keep a British National hive, our British National hive guide can help you understand the format. The aim is a reliable support that makes routine inspections more manageable.
Key Takeaways
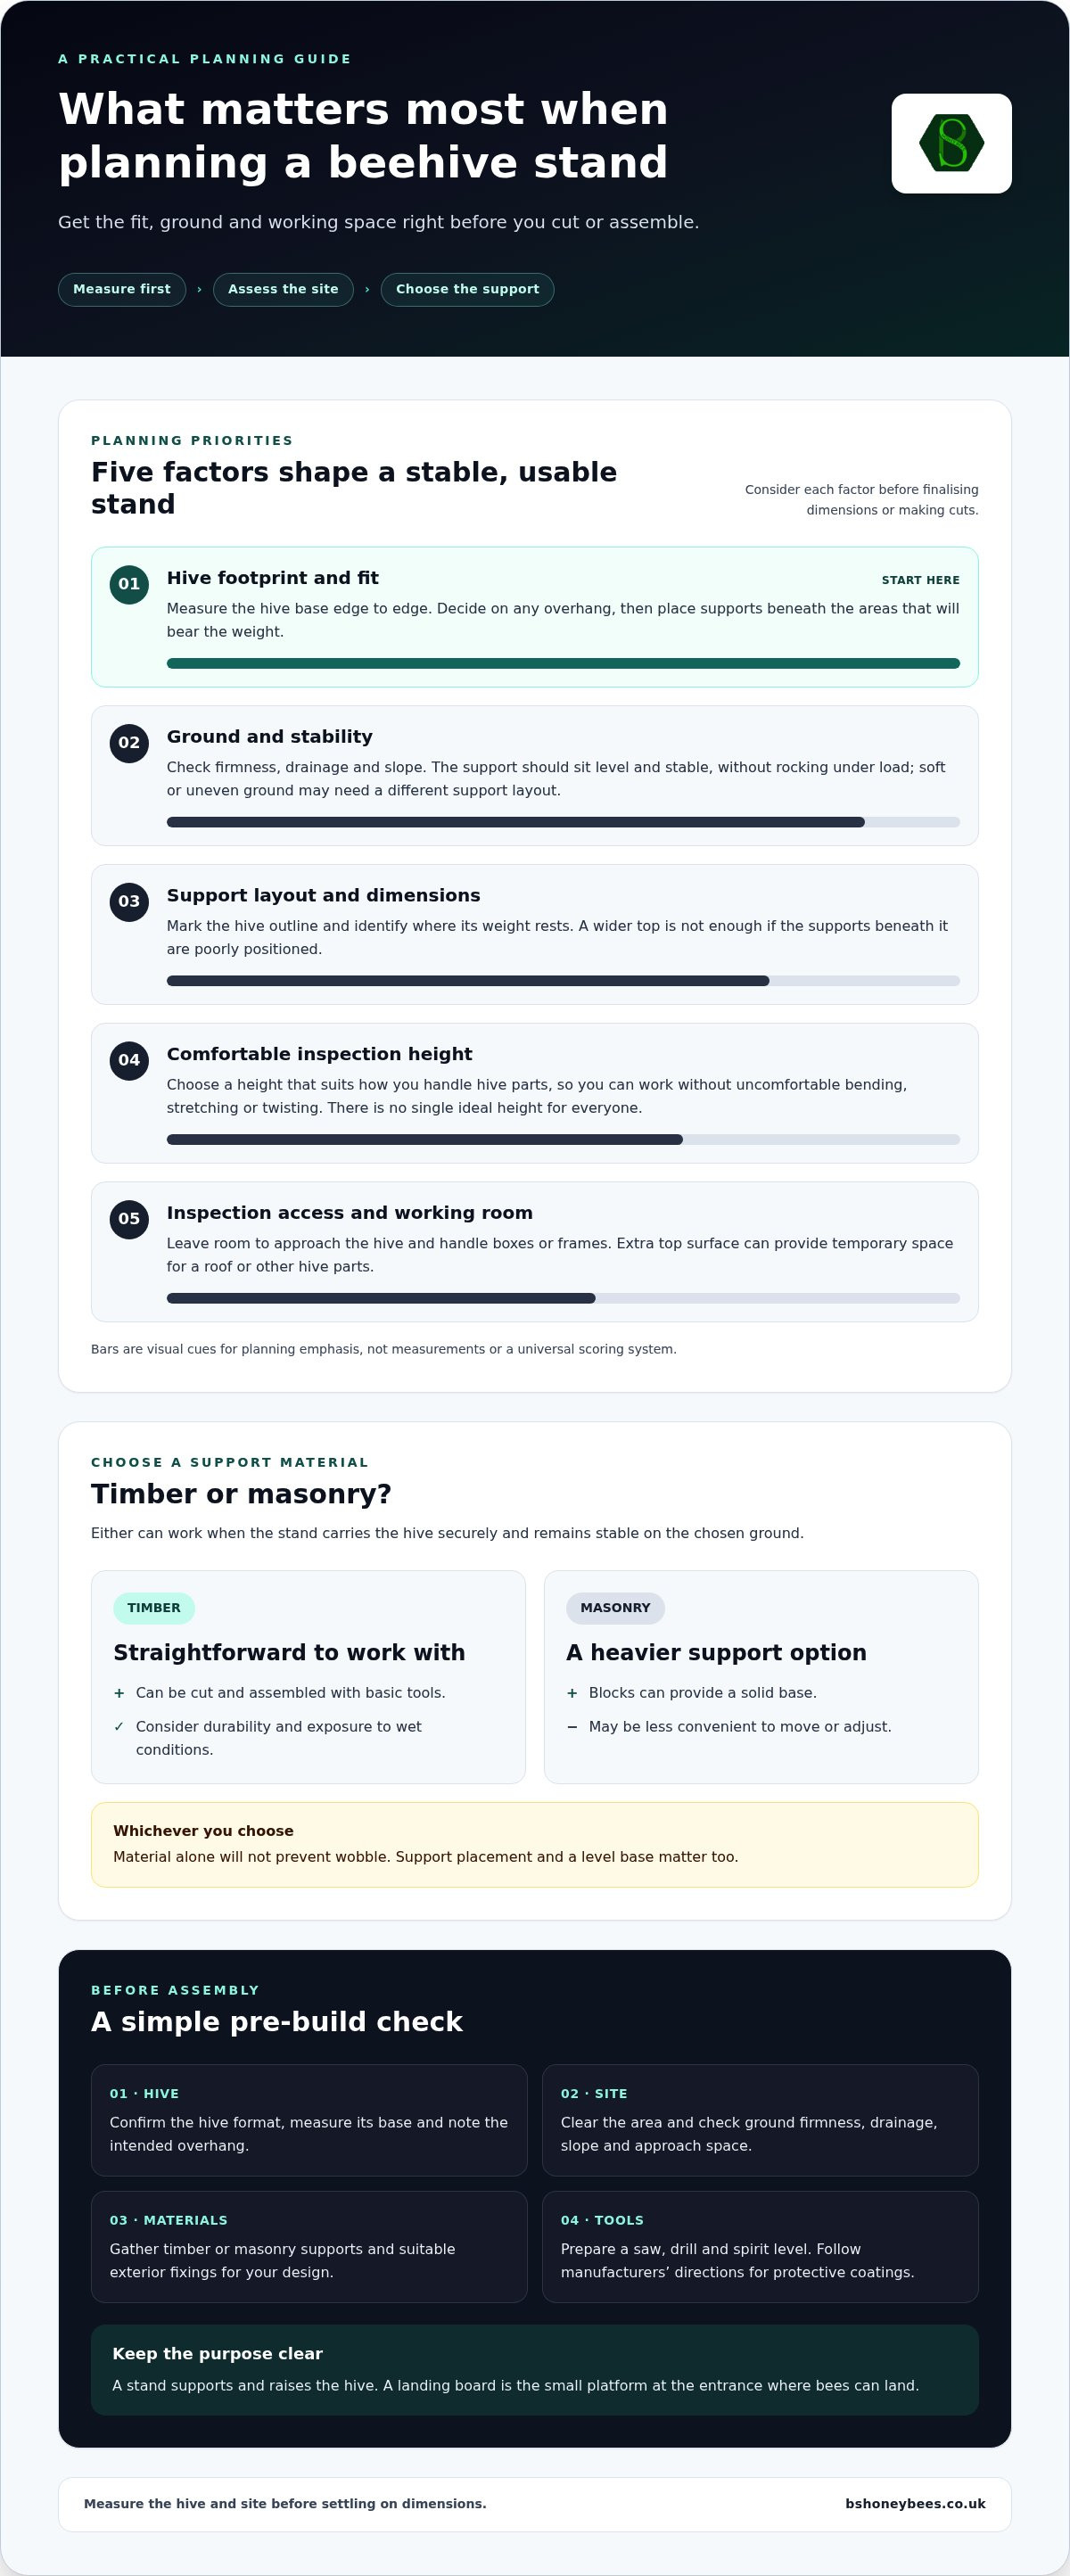
- Measure your hive base and planned overhang before drawing up dimensions, so the finished stand fits your chosen hive format.
- Gather suitable supports, fixings and basic tools before you start. A spirit level helps you check alignment as you build.
- Follow a clear sequence for how to build a beehive stand, adjusting each cut to your measurements and chosen design.
- Assess the ground and inspection space before positioning the stand, and leave room for the equipment you use during checks.
- For a British National hive, size the support to its measured base rather than relying on a one-size-fits-all plan.
Why build a beehive stand before your colony arrives?
Prepare the support before the bees move in, and you can check its fit, stability and position without working around an active colony. A beehive stand is a firm structure that raises the hive above the ground. It gives the hive a defined, level base and can make regular inspections more manageable. The right design depends on the hive’s footprint, your comfortable working height and the conditions at the site.
A beehive stand supports the hive; a landing board is the small platform at the entrance where bees can land. They have different purposes, even if a stand’s top extends beyond the hive and provides extra room. For an overview of hive structures and types, see Beehive.
What does a beehive stand do?
Raising the hive keeps its base clear of direct ground contact and reduces exposure to splashback from rain or wet soil. A stand doesn’t make the hive weatherproof, so the site and materials still matter. However, a raised support can help keep the bottom equipment cleaner and easier to inspect.
Height affects how you work, too. A hive at a comfortable level can reduce repeated bending when you lift boxes or examine frames. There’s no single ideal height for every beekeeper. Consider your stature, how you handle hive parts and whether you can work steadily without stretching or twisting.
A stand with extra top surface can provide temporary space for a roof or other hive parts during an inspection. Treat this as useful working room, not a substitute for measuring the hive base or planning where equipment will go.
What makes a stand suitable for your hive?
Start with a firm, level and stable support, with a top sized to carry the hive base securely. The stand should not rock under load or leave the hive perched unevenly. Its legs or supports must also suit the ground. A design that sits securely on a firm surface may need adjustment on soft or sloping ground.
The principles apply to every stand, but the dimensions depend on your setup. Measure the hive base and any overhang you intend to allow. Don’t rely on a generic plan or another beekeeper’s measurements. Hive formats differ, so confirm which one you’ll use before deciding the stand’s width and length. If you’re preparing for a British National hive, use its measured base as your starting point and consult the British National hive guide for format context.
- Fit: Match the top of the stand to the hive’s measured footprint.
- Posture: Choose a working height that lets you inspect without uncomfortable bending or reaching.
- Site: Allow for the ground and the space needed to approach and handle hive parts safely.
That planning is the first practical step in how to build a beehive stand. Set the hive format, working height and location before settling on a design. Your measurements will then reflect your actual apiary rather than guesswork.
Plan your beehive stand: measure the hive, site and working space
A sound plan starts with measurements, not a ready-made cut list. Hive formats vary, and the space you need for inspections depends on how you handle boxes and frames. Record the dimensions of your hive, assess the ground where it will sit, then choose a design that suits both. This gives you a practical basis for deciding support positions, working height and materials before you start cutting.
Choose a design and calculate dimensions
Measure the hive base from edge to edge, then note any overhang you want the stand to provide. Mark the hive outline on paper and indicate where its weight will rest. Position the supports beneath those bearing areas rather than relying on a wider platform that is poorly supported. If you’re preparing for a British National hive, base the plan on its measured footprint. BS Honey Bees Ltd supplies British National hives and frames, so identify the format before finalising dimensions.
Next, consider how you work. Extra surface area can be useful if you need temporary space for a box or roof, but a larger stand isn’t automatically better. Leave room for your inspection routine and choose a height that lets you reach the hive comfortably while keeping the structure stable. A tall, narrow design may be less steady than a lower, broader one, so balance access with the base and support layout.
Use this checklist as a planning prompt, not a universal cutting plan:
- Hive: Measured base, intended overhang and support points.
- Site: Ground firmness, drainage, slope and room to approach the hive.
- Working space: Access for inspections and temporary placement of hive parts.
- Design: Chosen height, support arrangement and material lengths, all based on your measurements.
Select materials and prepare the site
Timber is straightforward to cut and assemble with basic tools, but its suitability depends on its durability and exposure to wet conditions. Using well-seasoned or properly dried timber helps prevent twisting and warping outdoors, a principle emphasised by custom sawmills like Bourbon Bigfoot Woodworking. Masonry supports, such as blocks, are heavier and can provide a solid base, though they may be less convenient to move or adjust. Either option must carry the hive securely and remain stable on the chosen ground. Material alone won’t prevent wobble; support placement and a level base matter as well.
Gather the materials and tools your design requires: timber or masonry supports, suitable exterior fixings, a saw, drill and spirit level. Choose fixings intended for the materials and outdoor exposure, and follow the manufacturer’s directions for any protective coating. Before assembly, clear the site and check whether the surface is firm, drains sensibly and can be levelled. Note any unevenness so you can account for it in the support layout instead of trying to correct a rocking stand after the hive is in place.
Once you’ve recorded the footprint, working area, materials and site conditions, you can plan a design that fits your apiary rather than copying dimensions intended for another hive.
How to build a beehive stand: a clear step-by-step method
With your measurements and design settled, assemble the stand in a controlled sequence. The method below is a planning framework for timber or masonry supports, but the details depend on your chosen construction. Keep the hive off the stand until you’ve checked every support and joint. Never use a colony to weigh down or steady an unfinished structure.
- Lay out the components. Work on a flat, clear surface and arrange the frame pieces and supports according to your plan. Check each measurement against your notes, including the hive footprint and any intended overhang. Confirm that matching pieces are equal in length, then mark the position of each joint or support point before assembly.
- Cut and prepare the parts. Cut lengths to suit your measured hive and selected design. Don’t copy dimensions from a different stand or hive format. Use the saw carefully on a stable work surface, keeping hands clear of the blade and securing the material before cutting. Check the cut ends and edges, and make sure the parts fit together as intended before fixing them.
- Assemble the frame. Join the frame using fixings suited to the materials and outdoor conditions. Keep the components aligned as you drill and fasten them so the frame doesn’t twist out of square. Tighten each connection securely and follow the fixing manufacturer’s guidance. If your plan includes braces or cross-members, fit them in the specified positions to help resist movement.
- Fit the supports beneath the frame. Position the legs, blocks or other supports beneath the points where the hive will bear on the stand. Their placement should distribute the load rather than leave an edge or corner unsupported. For masonry, check that each support sits flat and has firm ground contact. For timber, confirm that the joints are secure and the supports align with the frame.
- Set the stand in position. Move the completed structure to the prepared site, taking care not to strain yourself or let it twist during handling. Check that each support meets the ground properly. If one sits on a hollow or soft patch, reposition or correct the base before proceeding.
- Check level and stability. Place a spirit level across the top in both directions. Then apply controlled hand pressure to different sides and corners to check for rocking, loose joints or shifting supports. Correct any movement or uneven contact before use. Don’t rely on the weight of the hive to hold the stand steady.
Take your time at each check. Careful layout and secure joints make a stronger build, but the final test matters just as much: the stand must sit level and remain stable before you place a hive on it.
Position and maintain your beehive stand for safer, easier inspections
A level check on the workbench isn’t enough. The ground can affect how the stand sits once it’s in position, so assess the site again before placing a hive on it. Stability depends on firm ground, suitable supports and sound assembly. If any part shifts or rocks, correct it first.
Set up the stand and check access
Place each support on firm ground, then check the top with a spirit level in both directions. If the stand is uneven, adjust the base or move it to a more suitable patch rather than forcing the hive to sit level on top. Press gently on different sides to identify rocking or movement.
Next, walk through the inspection you expect to carry out. Make sure you can approach the hive safely, reach the entrance and handle your equipment without squeezing past obstacles. Leave temporary space for a removed box or roof if your routine requires it. The right arrangement depends on your site and working method, not a universal layout.
Inspect and care for the stand over time
Include the support in your regular apiary checks. Look for movement, loose fixings, cracked or decaying timber, damaged joints and supports that have shifted. Pay particular attention after heavy rain, ground disturbance or work around the site, as these can affect how firmly the stand sits. Recheck the level if it appears to have moved.
If you’ve applied a protective coating, follow the manufacturer’s instructions for application and drying. Keep uncured treatments away from bee contact, and don’t put the hive on the stand until the coating is ready for use as directed. A surface that looks dry may still need more time, so follow the product guidance rather than guessing.
Before placing a hive, check that the stand is:
- On firm ground, with each support making stable contact.
- Level across the top in both directions.
- Free from rocking, loose joints and visible damage.
- Positioned with clear access to the entrance and enough room for your inspection routine.
Repeat these checks as part of ongoing hive care. A stand that was stable when first positioned can shift as the ground or structure changes. Don’t let the hive’s weight disguise a problem. Put it in place only when the empty stand feels secure and its supports sit evenly.
If you’re planning around a British National setup, explore British National hives and frames to identify the hive format your stand needs to accommodate.
Match your stand to the hive and prepare for your next beekeeping step
A well-planned stand starts with the hive format, not a generic set of dimensions. Identify the hive you intend to use, measure its actual base, plan the support points and working space, then build, level and inspect the finished stand before bringing the hive into position. This sequence helps you catch a mismatch while it’s still easy to adjust.
Check hive compatibility before completing your plan
Use the hive itself, or its exact specifications, as your reference. Measure the base from edge to edge and consider how it will sit on the supports. A stand that looks close in size on a sketch may leave an edge unsupported or position the hive awkwardly once assembled. Account for any intended overhang and the space you need to handle boxes or other parts during inspections.
A British National hive needs a stand sized to its own measured base. Don’t assume that dimensions from another hive format or a generic diagram will give a suitable fit. Understanding the chosen hive’s structure can also help you plan where the stand should support it. For format and equipment context, consult The British National Beehive: The Definitive 2026 Guide to the UK Standard.
Keep your notes with the plan: hive format, base measurements, support positions, chosen height and any workspace allowance. They’ll be useful if you later alter the setup or build another stand. Your notes will also show which dimensions are specific to your hive and which are part of your chosen design.
Take the next step with a well-planned apiary
Finish and test the stand before moving a hive into position. Check the top for level, confirm that the supports sit firmly and make sure nothing rocks or shifts under gentle pressure. Then assess the whole working area. You should be able to reach the hive and carry out routine tasks without the stand or nearby equipment obstructing access.
Once the support is ready, plan the rest of your setup around the hive format and available space. If you’re also planning for a colony, the guide Honey Bee Nucs for Sale UK: The Complete 2026 Buyer’s Guide is a relevant next step as you consider your beekeeping plans.
In short: identify the hive, measure its base, plan the support and working space, build to your measurements, then level and inspect the stand before use. If a British National hive is part of your plan, explore British National hives and frames as you prepare your equipment.
Set your apiary up for the season ahead
A well-matched stand is a practical foundation for the beekeeping work to come. Before settling on your final layout, make sure your hive choice and apiary plans fit together, especially if you expect to add equipment or adjust your working space later. With the stand ready before the colony arrives, you can focus on a consistent inspection routine rather than making structural changes around an occupied hive.
Knowing how to build a beehive stand also starts with choosing a hive format and planning around its actual footprint. BS Honey Bees Ltd supplies British National hives and frames to beekeepers across the UK, giving you a practical next step if that format suits your plans.
Explore British National hives and frames and prepare your apiary with confidence. A considered setup now can make the work ahead more manageable.
Frequently Asked Questions
Can I move a beehive stand with a colony on it?
It’s safest not to move a stand with an occupied hive on it. The combined weight can make the load difficult to control, and shifting the hive may disturb the colony or cause parts to slip. If the location needs to change, plan how to move the hive and stand separately, using appropriate beekeeping guidance for relocating an occupied colony. Don’t attempt to lift or drag a loaded stand alone.
Should a beehive stand be painted or treated?
Painting or treating the stand is optional, but an exterior finish may help protect suitable timber from the weather. Choose a product intended for outdoor use and follow its label for application, ventilation and drying. Keep wet or uncured coatings away from bees, the hive entrance and any equipment they may contact. Avoid treating surfaces that could touch the hive unless the product directions say that use is suitable.
Does a beehive need a separate landing board?
Not always. A landing board is a small platform at the entrance; it isn’t the same as the stand that supports the hive. Some hive arrangements have an entrance area bees can use without an additional board. If you add one, make sure it doesn’t obstruct the entrance or interfere with the floor, entrance reducer or other hive parts. Check how your chosen hive is designed before fitting extra pieces.
Can I put a beehive stand on grass?
Yes, provided the ground is firm enough to support the stand without sinking or shifting. Grass can conceal soft patches and uneven soil, so check the support points rather than judging the surface by appearance alone. Keep vegetation from growing across the entrance or blocking your approach. If you need to trim nearby grass, work carefully and avoid disturbing bees at the entrance.
How do I stop a beehive stand from wobbling?
Find the cause before trying to steady it. Check for a loose joint, a support that doesn’t meet the ground or soft soil beneath one side. Tighten or repair faulty connections, then reposition or adjust the base so each support sits firmly. Don’t rely on loose objects that could shift under load. To build a beehive stand that stays steady, prioritise stability in the design as well as the final check.
Can one beehive stand support more than one hive?
It can, but only if the design and materials are suitable for the combined load and the stand has adequate support beneath each hive. Allow space to inspect each colony and handle equipment without crowding. A long frame supported only at its ends may flex or become unstable. Plan the whole arrangement first, and don’t assume a stand made for one hive can safely carry two.
How often should I check a beehive stand?
Check it before first use, then include a quick look during routine hive inspections. Watch for movement, damaged timber, loose fixings or supports settling into the ground. Check it again after heavy rain, ground disturbance or work that may have shifted the stand. If you notice rocking or damage, deal with it before the next inspection rather than waiting for a set calendar date.